
How to: Build an Application from Intent in Think4Ever
Overview
A working app can still miss the business need. That's why it pays to agree on users, business rules and release scope before you build. In Think4Ever you start from the business outcome, not a blank coding prompt. You describe it in plain language, and Think4Ever turns it into a Living Blueprint: one connected design of your application that it uses to design the screens, plan the build and run the app.
There are two starting points: business intent or existing code. Both lead to the same Living Blueprint. This guide starts from intent.
The blueprint holds everything a team needs to agree on before coding:
- Requirement specifications, user roles, epics and user stories
- Business flows and business rules
- Concept map and data objects
- Functional architecture, API endpoints and integration maps
- User interface design
Because the code is built from the blueprint, the design stays the single source of truth as the app grows.
This guide follows a real example from start to finish: an AI retirement planning app that works like a professional investment banker.
Watch it first: see the whole flow in the two-minute Design → Code video, also on the think4ever.com home page.
The journey at a glance
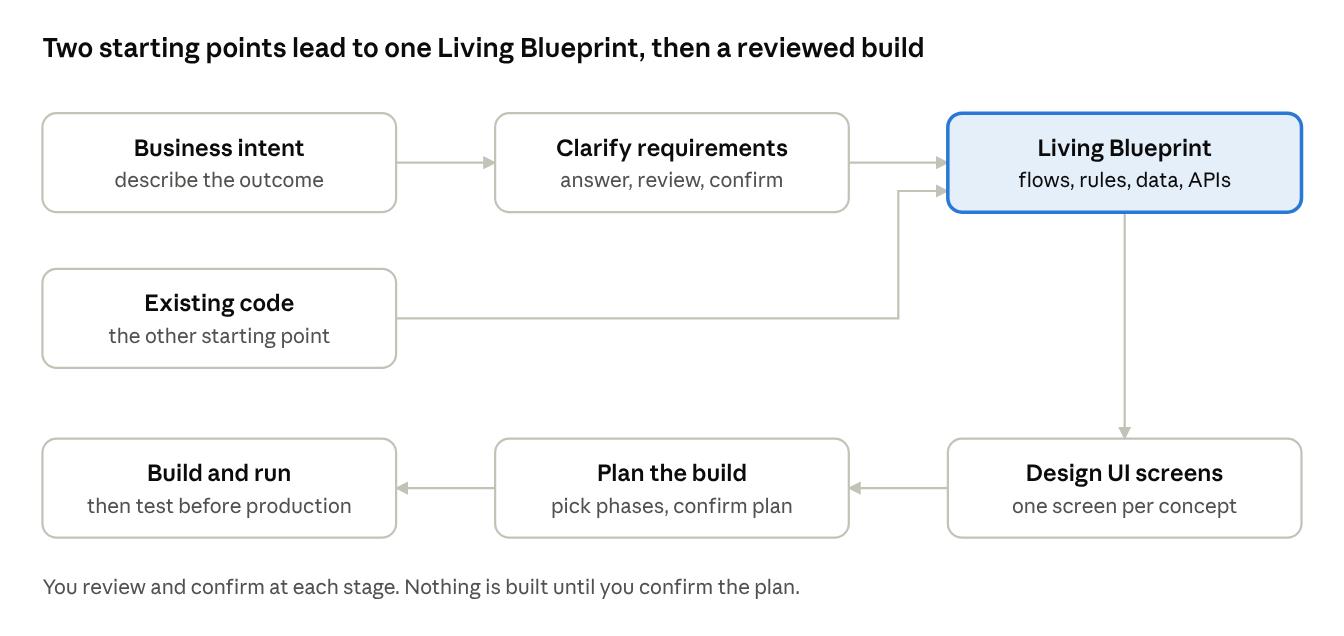
From intent to running app · 6 stages
You clarify the intent until it becomes a Living Blueprint. Screens, the build plan and the running app all come from that blueprint.
Step 1: Describe your intent
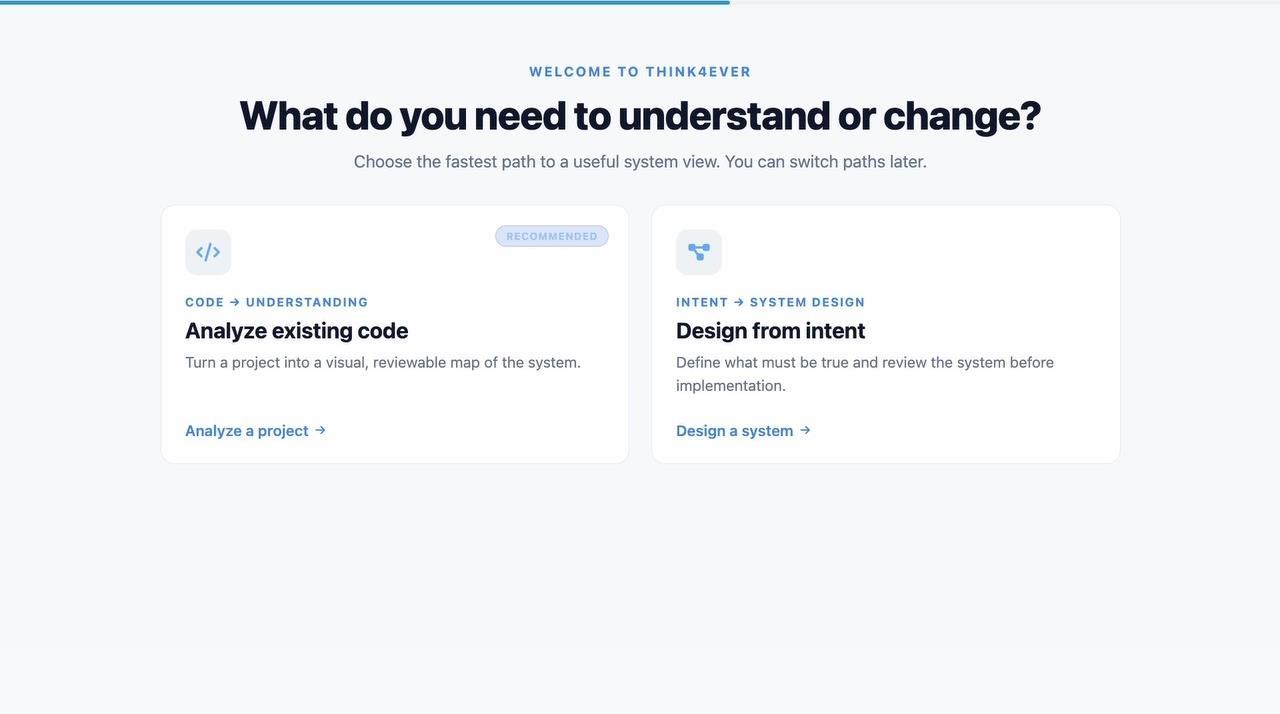
- Choose Design from intent. When you start, Think4Ever asks "What do you need to understand or change?" Pick Design from intent → Design a system. Pick Analyze existing code instead if you already have a codebase.
- State the business objective. Describe what the application should accomplish, in business terms. For example: "Customers can request refunds, managers can review exceptions, and every decision remains visible to the customer." You can also:
- Attach files such as specs or mockups
- Import from Jira & other tools
- start from one of 299 ready-made solution designs, such as Teletherapy Session Hub or Class Scheduling System
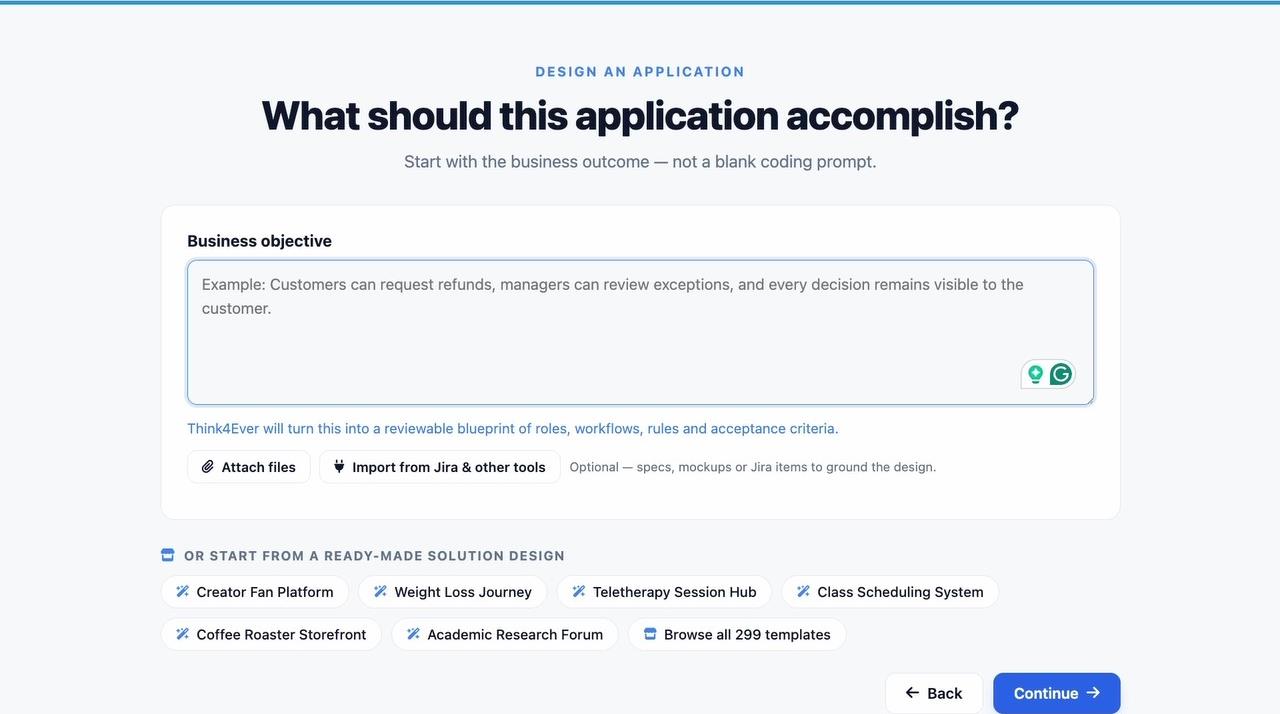
- Click Continue. Your intent goes to ThinkBrain, Think4Ever's AI assistant. In the example: "This project is a personal retirement planning application that mimics the advice of a professional investment banker, powered by AI."
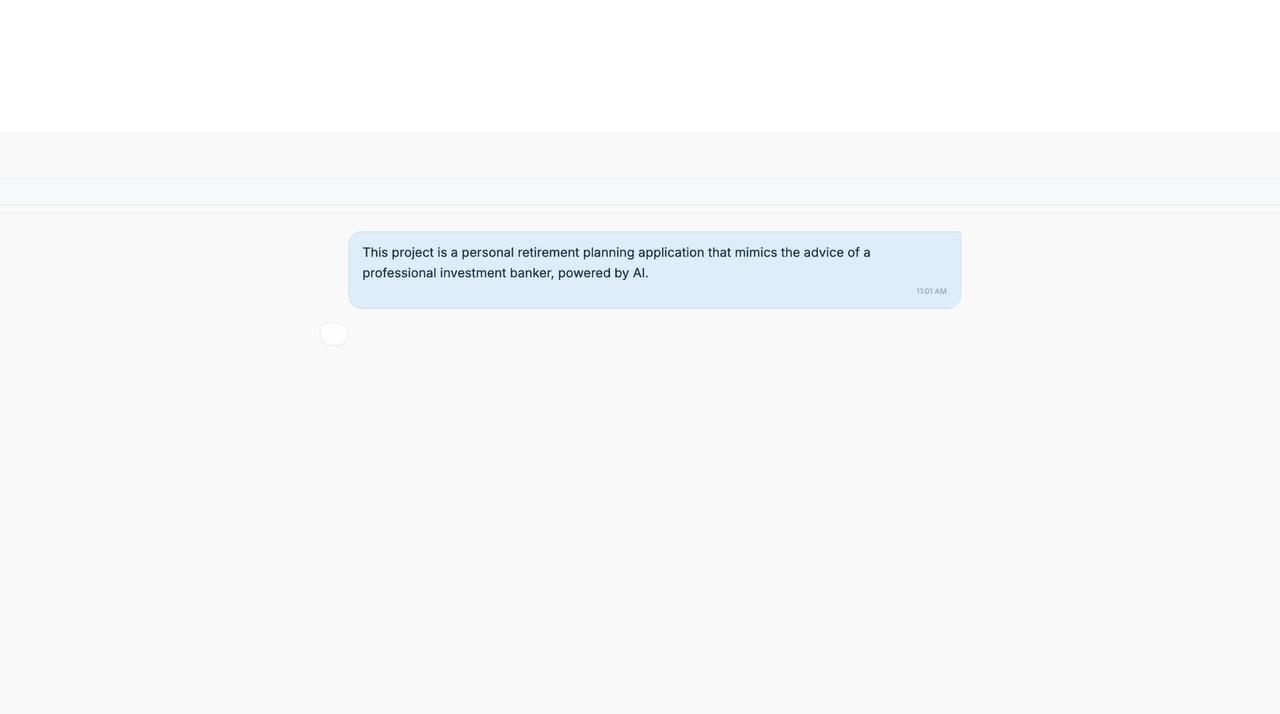
- Answer ThinkBrain's questions. ThinkBrain asks a few questions in chat, such as whether this is a personal tool or each user gets their own account, whether you have existing code or specs, and how deep to go before coding. For an important project, choose full detailed discovery.
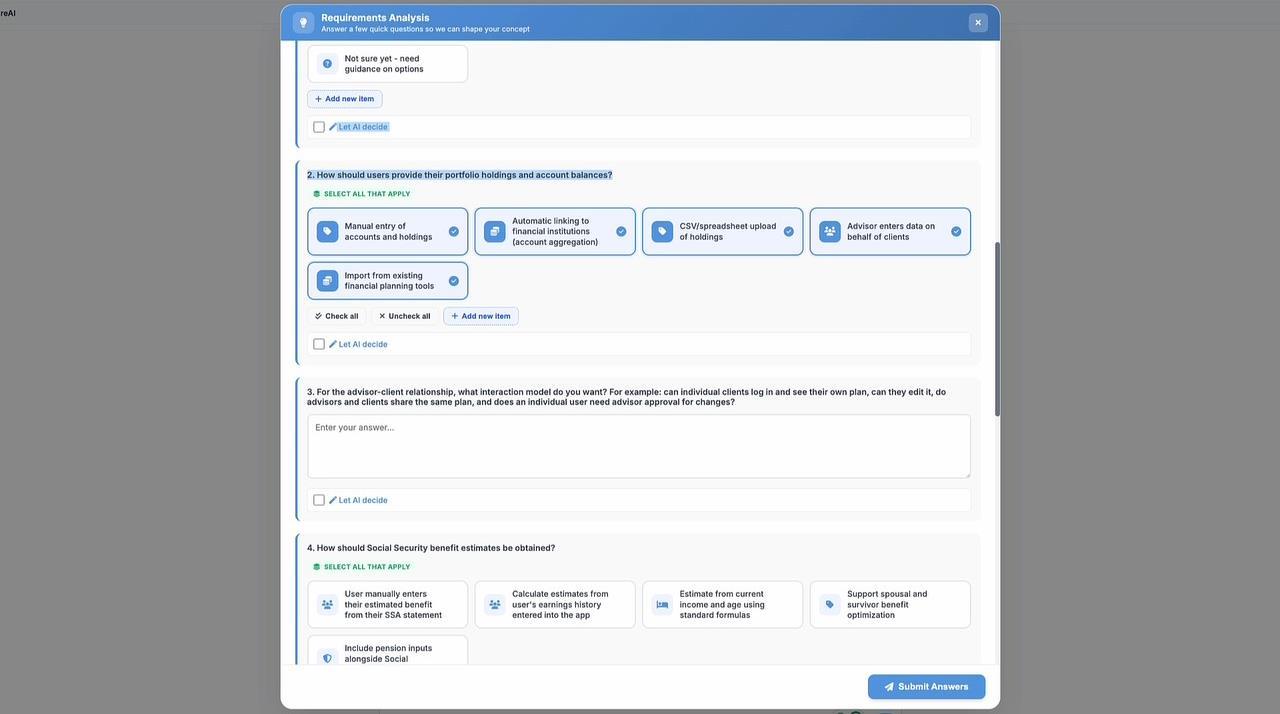
- Complete the Requirements Analysis. ThinkBrain then asks targeted questions about your app. Tick the options that apply, add your own with Add new item, or tick Let AI decide. Then click Submit Answers.
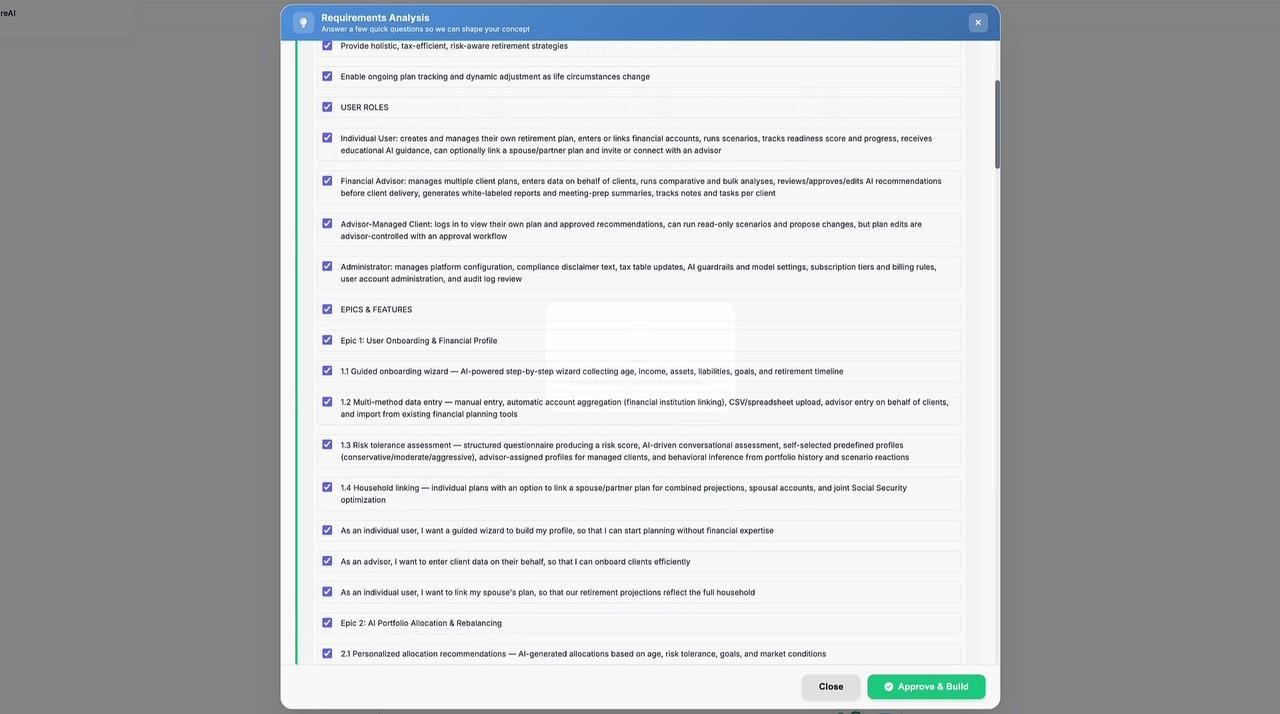
- Review and approve the requirements. ThinkBrain produces goals, user roles, epics, features and user stories. Review the summary, untick anything you don't want, and confirm the direction by clicking Approve & Build.
Step 2: Review the Application Blueprint
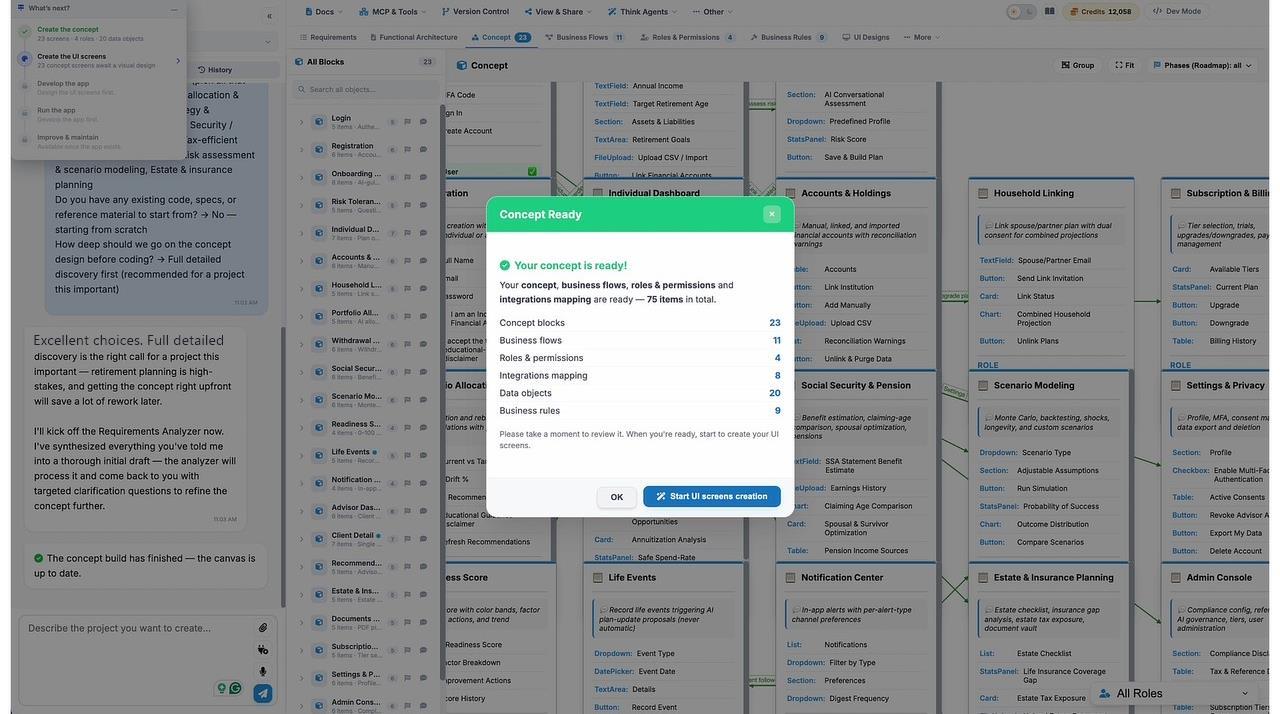
ThinkBrain builds the concept from your approved requirements. When it's done, a Concept Ready summary shows what was created. For the retirement app, that was 75 items:
| Part of the blueprint | Items |
|---|---|
| Concept blocks | 23 |
| Data objects | 20 |
| Business flows | 11 |
| Business rules | 9 |
| Integrations mapping | 8 |
| Roles & permissions | 4 |
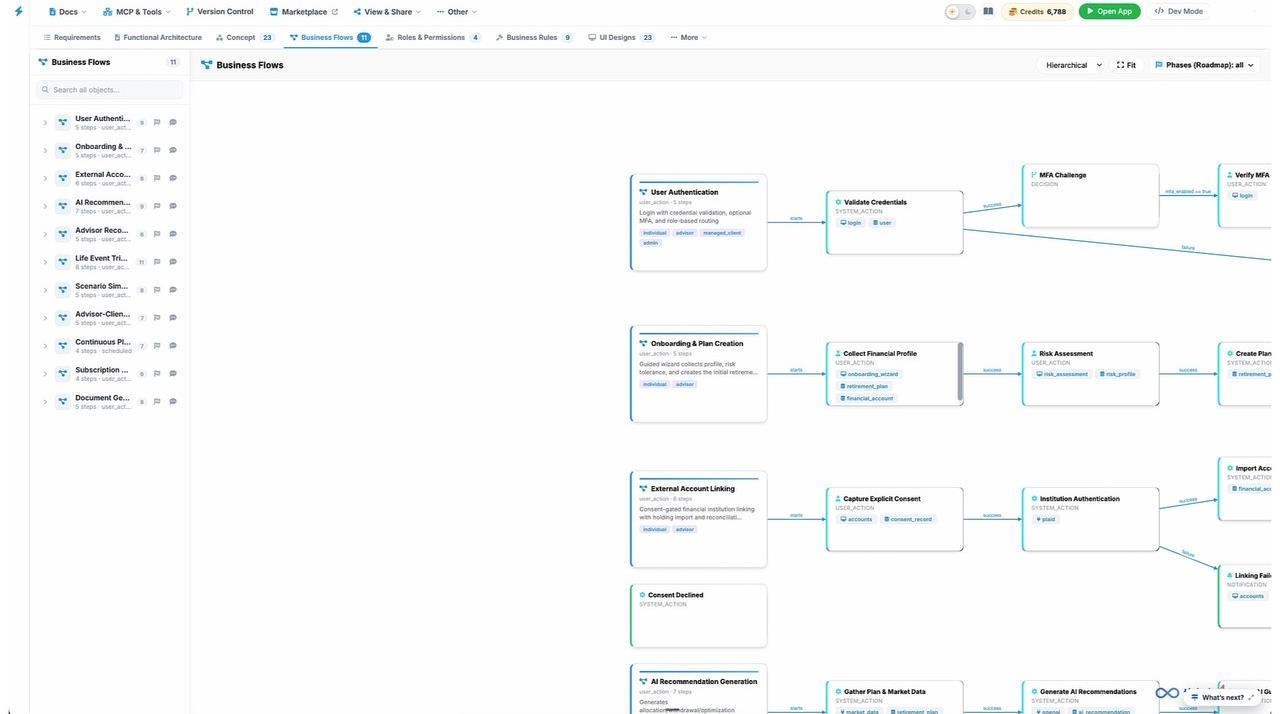
Review each part in the tabs across the top of the project: Requirements, Functional Architecture, Concept, Business Flows, Roles & Permissions, Business Rules and UI Designs. Business flows, for example, show each process step by step, including decisions, success and failure paths, and the data each step touches.
Together, these artifacts give your team a 360-degree view of the application before development: business intent, technical specifications, look and feel, and operational workflows. Change anything that isn't right before you move on, either by asking ThinkBrain in the chat or by editing directly. Fixing the design now saves rework later.
Step 3: Design the UI screens
- In the Concept Ready summary, click Start UI screens creation. You can also follow the What's next? checklist, which tracks your progress: Create the concept → Create the UI screens → Develop the app → Run the app → Improve & maintain.
- ThinkBrain designs one screen for each concept block and reports each screen in the chat as it's created. The retirement app got 23 screens, from Login and Onboarding Wizard to Portfolio Allocation, Scenario Modeling and Admin Console.
- Open the UI Designs tab to see every screen. Click Preview Designs for an interactive mockup of all screens, or Open on any screen to look at it in detail.
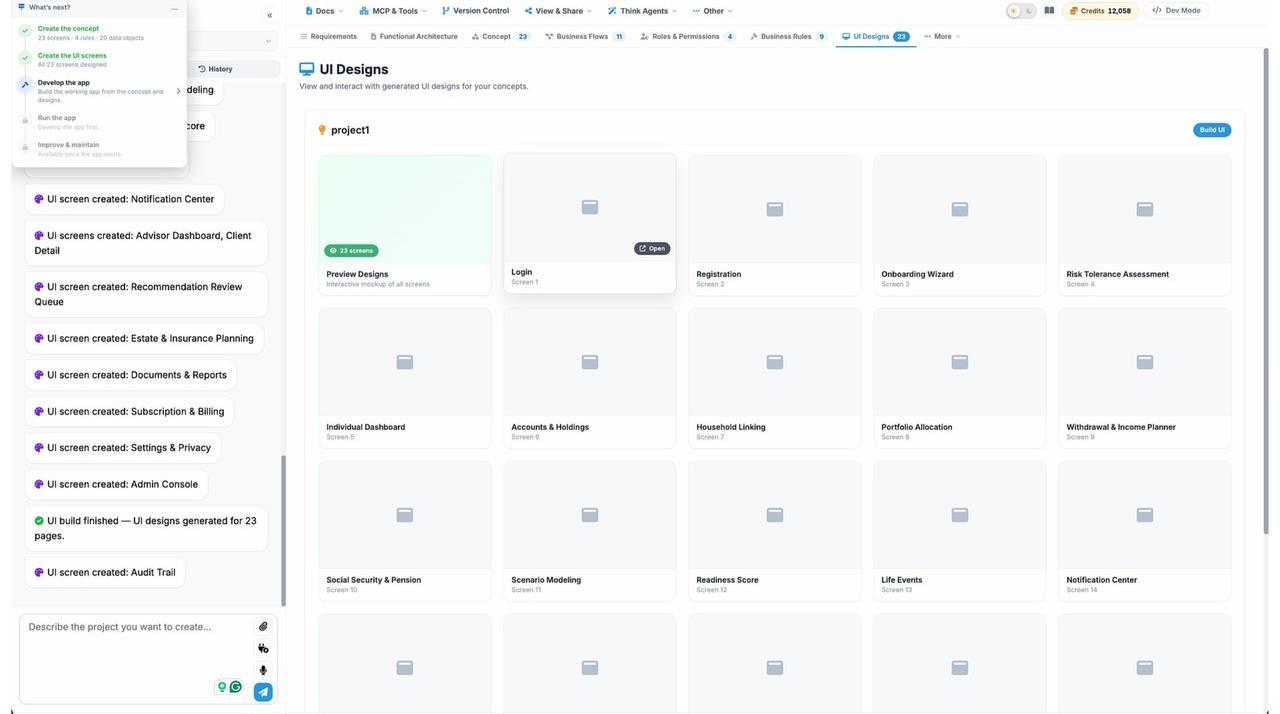
Ask ThinkBrain for any design changes. When you're ready, choose Develop the app in What's next?. The Living Blueprint carries the system design, and the behavior behind each screen, into development.
Step 4: Build and run the app
Choose how to build
Your design is a complete, machine-readable spec, so you can build it in Think4Ever or hand it to the coding tool you already use:
| Option | How it works | Uses |
|---|---|---|
| think4ever Agents | Think4Ever agents build the full app on the platform (database, services and UI), then run and test it for you | Think4Ever credits |
| Claude Code | Reads the design over MCP and builds it on your machine | Your Claude plan |
| Cursor | Connect once over MCP, and Cursor builds from the design inside your IDE | Your Cursor subscription |
| Codex | Pulls the design over MCP and builds it locally | Your OpenAI subscription |
Other MCP platforms also work, including Claude Desktop, VS Code, Windsurf, Gemini CLI, Amazon Q and Kiro. External tools don't use Think4Ever credits.
Building with Claude Code or another MCP tool? The design stays in Think4Ever. You connect your tool once per project: open MCP & Tools → Claude Code, click Create token, run the Add the server command, and restart Claude Code. Claude Code can then build the app on your machine, or write the code straight into your Think4Ever workspace, where it runs on Think4Ever's app server and database with a public URL. For the full walkthrough, see How to: Design in Think, Code in Claude.
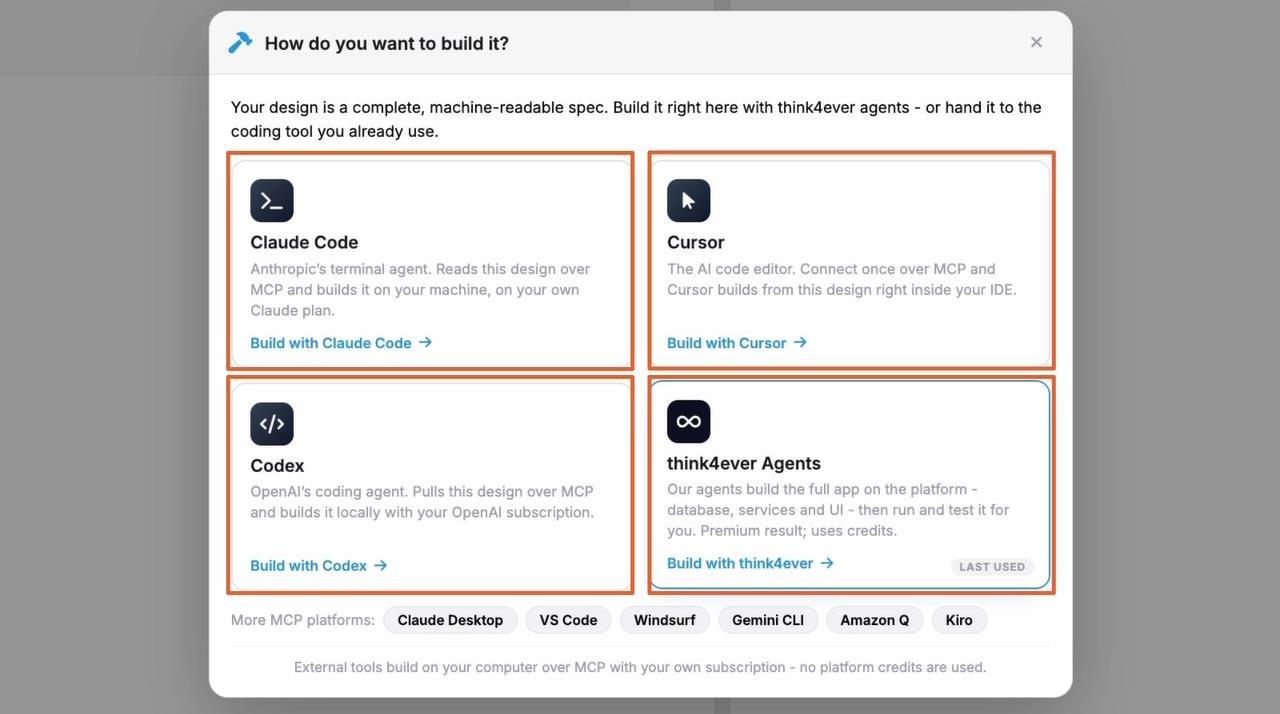
The rest of this step uses think4ever Agents.
Plan the build
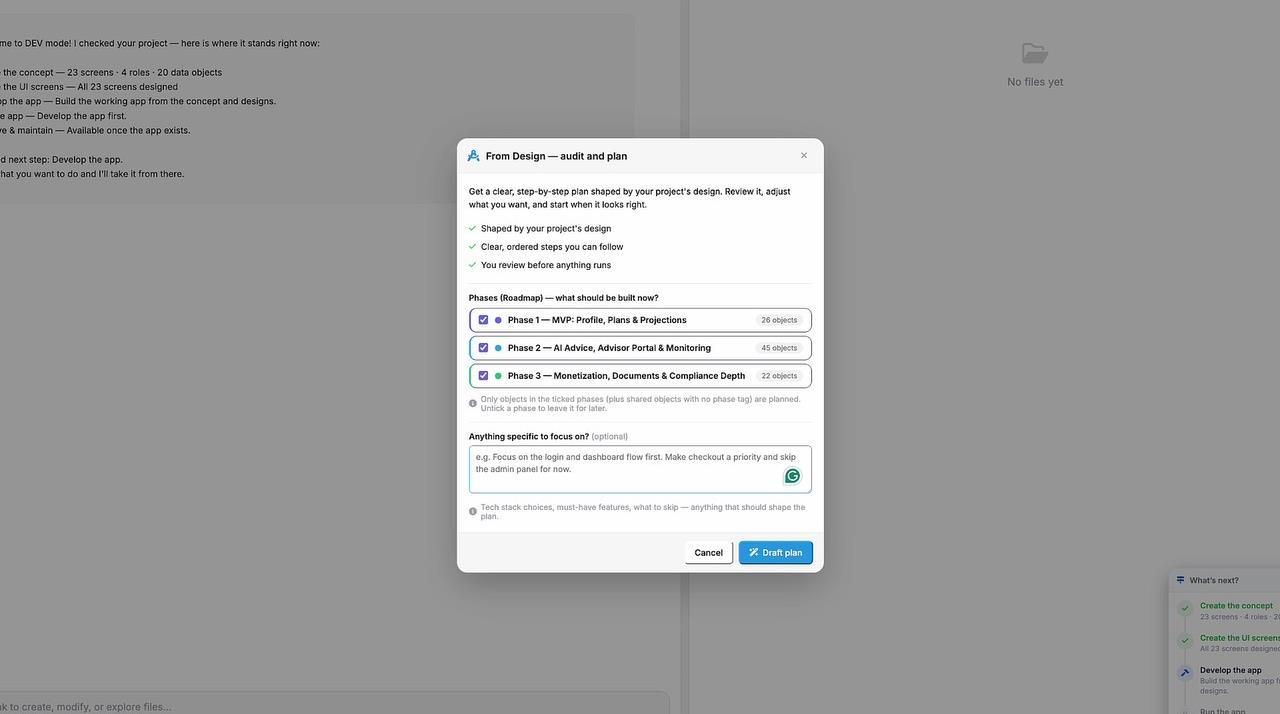
- In From Design — audit and plan, tick the phases to build now. The roadmap phases come from your design. The retirement app had three: MVP; AI Advice, Advisor Portal & Monitoring; and Monetization, Documents & Compliance Depth.
- Optionally, tell Think4Ever what to focus on, for example tech stack choices, must-have features or what to skip.
- Click Draft plan.
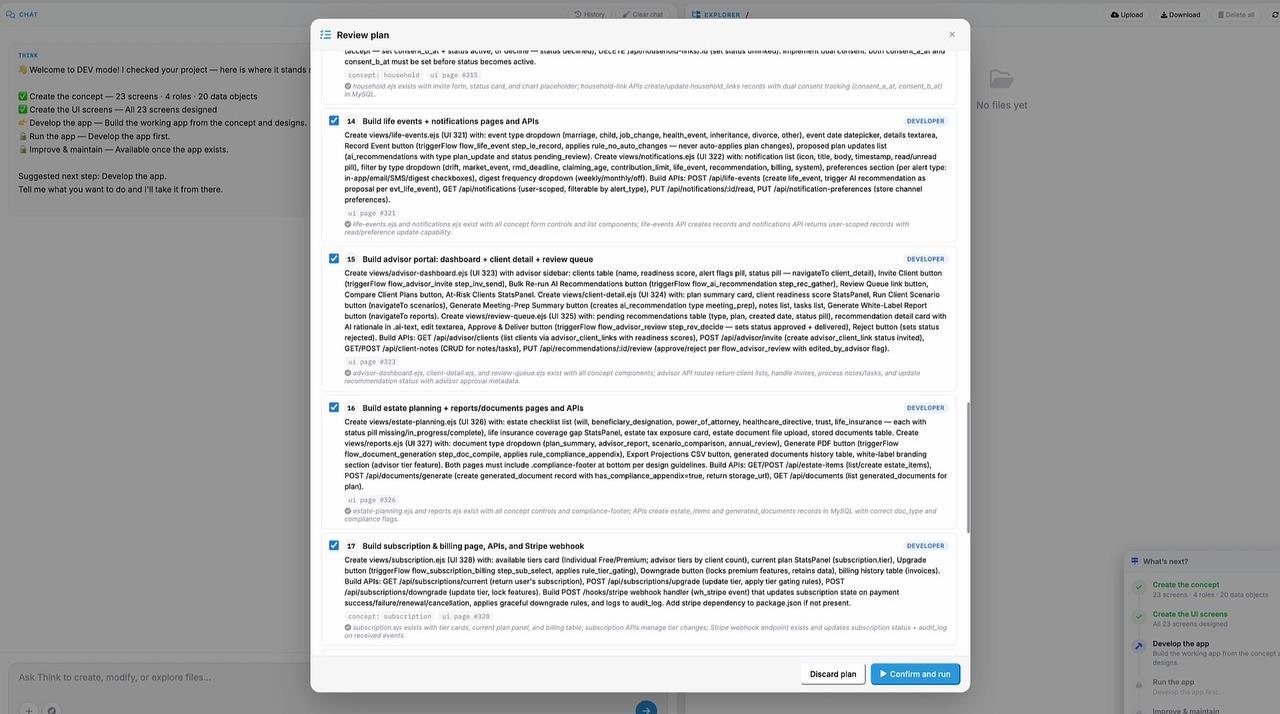
- Review the plan. Every step lists the pages, APIs and data it will build, which agent does it (for example Developer or Database) and the UI screen it implements. Untick any step you don't want, then click Confirm and run.
Watch it build
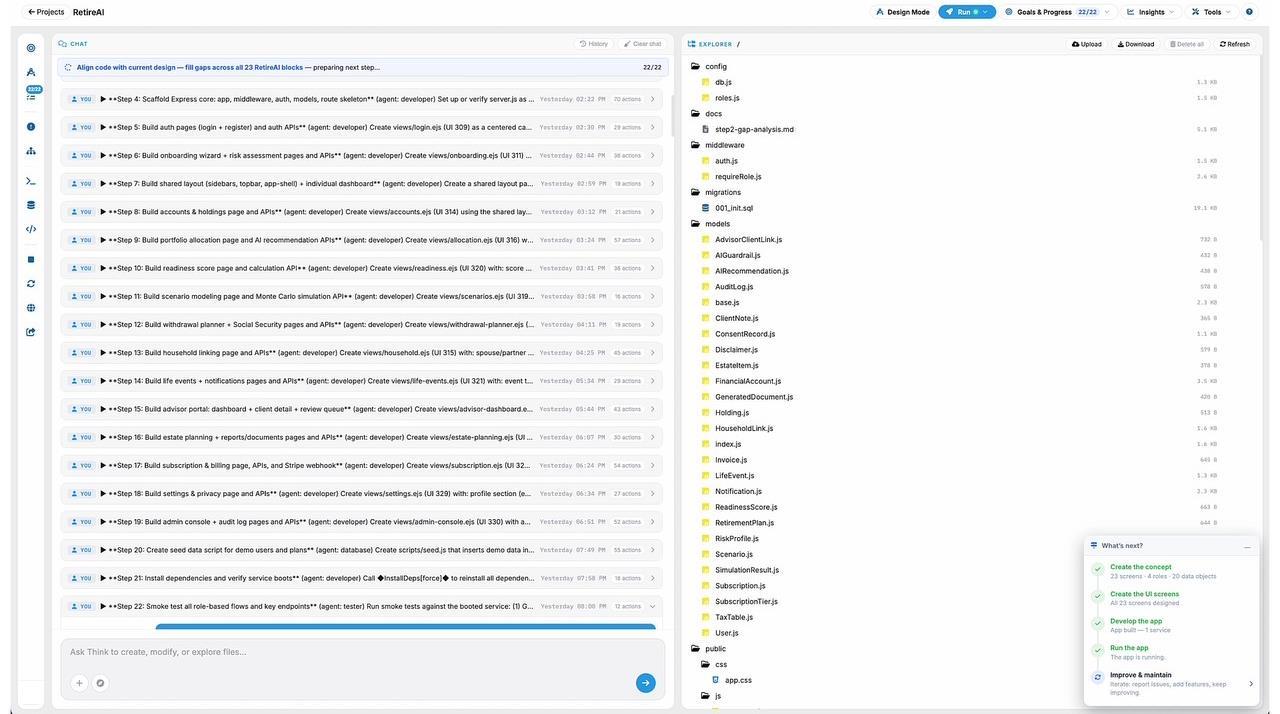
The agents work through the plan step by step. Progress shows in the chat, with a count such as 22/22, and files appear in the Explorer as they are written. The What's next? checklist marks Develop the app and Run the app as done once the build finishes and the app is running.
Run and improve
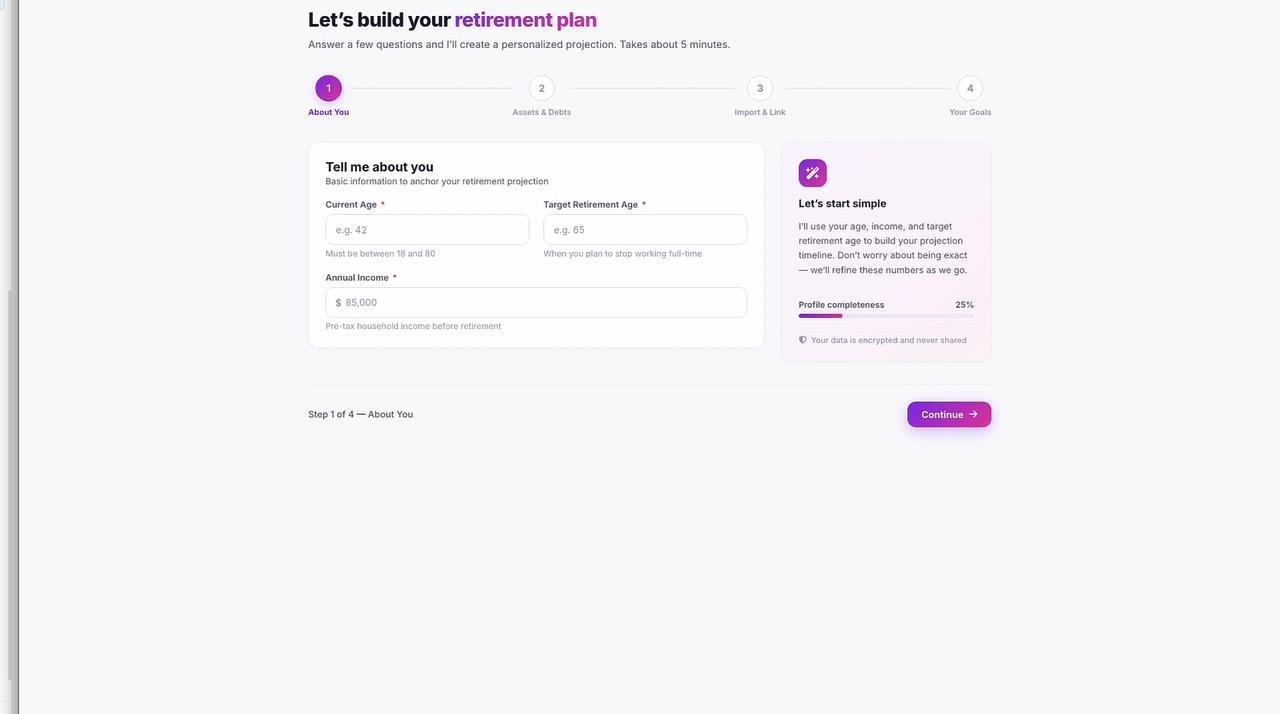
Click Open App to use the running application. The retirement app opened with a guided four-step onboarding: About You, Assets & Debts, Import & Link, and Your Goals.
A running app is the build outcome, not proof that every requirement is met. Inspect the generated files, try the main flows, and run functional and quality testing before you deploy to production.
From here, use Improve & maintain to report issues and add features. Change the design first, and Think4Ever keeps the code aligned with it.
Tips and FAQ
Write the objective as an outcome.
Say what users should be able to do and what must stay true, not which framework to use. ThinkBrain turns outcomes into roles, workflows, rules and acceptance criteria.
Use Let AI decide when you're unsure.
In Requirements Analysis, you can let ThinkBrain choose for any question and review its choice afterwards.
Review before you build.
Every stage waits for you: you approve the requirements, review the concept, check the screens and confirm the build plan. Nothing runs until you say so.
Design the screens before you code.
Building screen by screen against a planned UI gives better results than letting the coding tool invent the screens. This holds whether Think4Ever agents or an external tool write the code.
Do I need existing code or specs?
No. You can start from a single sentence. Attach specs, mockups or Jira items if you have them, and ThinkBrain uses them to ground the design.
Can I build only part of the app first?
Yes. When you plan the build, tick only the roadmap phases you want now and add the rest later.
Can I use my own coding tool?
Yes. Claude Code, Cursor, Codex and other MCP tools build from the same blueprint on your own subscription, without using Think4Ever credits. See How to: Design in Think, Code in Claude.
Code changed outside Think4Ever?
Ask Think4Ever for a fresh scan of the code. It updates the project structure and concepts so the blueprint matches the code again.
Already have a codebase?
Choose Analyze existing code at the start. Think4Ever turns your project into a visual, reviewable map of the system.
Ready to try it? Start free at think4ever.com and choose Design from intent.